


Video: Tippmann Response Trigger kit - Installation on 98 Custom Platinum Series Marker
Video Transcript: Tippmann Response Trigger kit - Installation on a 98 Custom Platinum Series Marker
Introduction:
What's up, everybody, and welcome to TippmannParts.com. My name is Stitch and, on this video, I'm going to show you how to install the Response Trigger Kit on the Tippmann 98 Custom Platinum Series.
Tools Needed:
So, the tools that we're going to need real quick, let me go over that, is going to be a 1/8 Allen key, a socket wrench, and a 5/16 socket wrench, a punch tool, this is a 1/4 punch tool, a hammer, and somewhere to put your bolts and everything that we're going to take off of the marker springs, and a rag as always. And, if you can or you feel like it, eye protection. Okay?
What's In The Kit?:
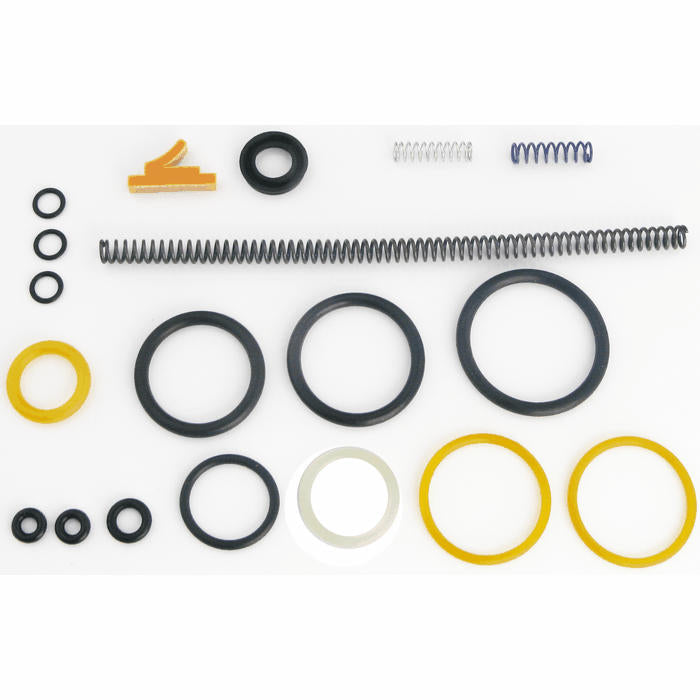
So, let me go over what comes in the kit real quick so you guys know what you're looking for. Alright. So, you open it up, flap it open this way. It has a little information over here on exactly what Tippmann 98 it covers, which is basically almost all the models because it has this nice little packet that comes in here with an extra hose and an extra spring for the older models of the 98 Custom. We have the actual response valve piston. Then, we have the feed line for the response piston. If we take out the foam, remove it, we have a nice little adjustable screwdriver that comes with the kit, which is awesome. And, then, you have your manual, your instruction manual, which will explain warranty and tell you how to put it together, and what marker you need what spring for and everything. So, that's awesome to have. Throw that onto the side. Close this up. Throw that that way. So, let's get our pieces back over here. Okay. So, we have -- let me open this up and show you guys exactly what we have. Okay. So, you have an extra tube, feed tube, an extra spring. This is going to be the spring that you need for the older models. And, then, you have an extra trigger spring. Okay. We're going to actually put that one in. So, let me actually put all this back in the plastic so we don't lose it. I'll zip that up and move this to the side, this screwdriver over there with that.
Marker Prep:
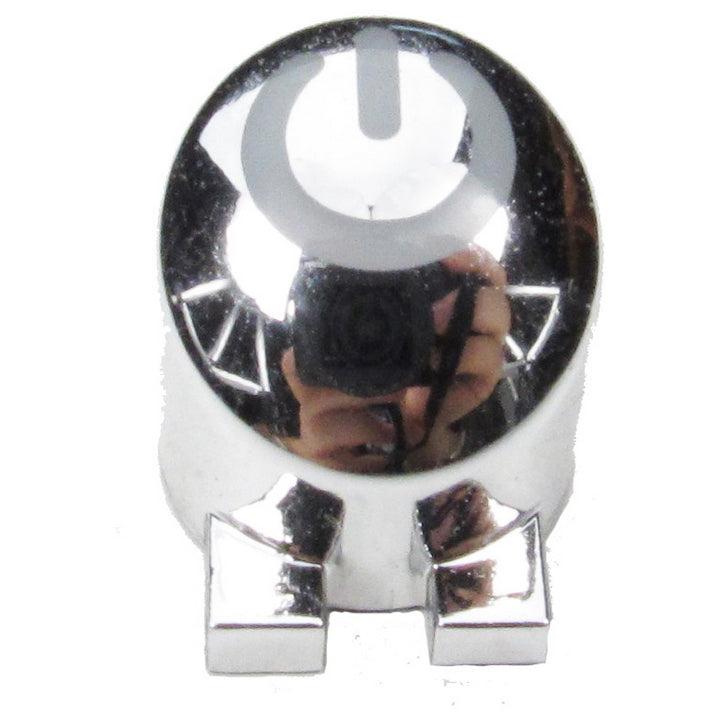
And let's get to the marker. To make it a little bit easier on yourself, remove the feed neck from your 98, push down the pin, slide it back, down and back. We're going to take off one, two, three, four, five bolts. We only have to take off the back end. So, the 1/8 Allen wrench is going to do that counterclockwise. I know how you guys love videos with guys taking off bolts. Isn't it so fun? Alright. I want to get some theme music going on, maybe Chips or something, [makes sound]. That'd actually be cool. So, counterclockwise is going to remove the bolts. Ooh. And maybe that's why. It's the awkward silence that gets everybody with the removing of the bolts. Alright. So, real quick, I'm going to put my hand over the marker and the trigger because there's a spring over here that likes to pop out and the bolt is actually under tension, so I'm going to put my hand. I'm going to place my finger on the sight right here in the middle, and then my thumb actually on the recharge handle, and just pop it up to split the marker in two pieces. And you guys could see right there. Okay? And, then, I'm going to grab the bottom and just lift it up and wiggle as I lift up. And it should remove really easy. You see this spring right here? It looks like it wants to pop out and, then, we got the bolt is under tension over here, so let's just cover everything up with your hand, hold onto the spring and the bolt, and just lift this up and remove the tension from the bolt. You can actually take that and put that to the side. And, then, what I'm going to do is I'm going to take a flathead screwdriver and get underneath the spring on the trigger, as I have my hand over it, so it doesn't pop anywhere and go flying around. Alright. So, that's another tool that you're going to need, another tool. Put that in my parts bin. And I'm going to remove a couple of items here. So, I'm going to take out the trigger, put it in the parts bin. It has a pin right here, parts bin. I'm actually going to remove the safety, the trigger guard itself. There's another spring right here, so put your finger over it, get your screwdriver underneath it, and pop it up. And there you go. Put that in the parts bin. Remove the trigger, set that to the side as well. Make sure that these pins right here don't want to move. Mine don't want to come out, so I'm going to leave them there. I'm not going to go crazy. Pull back the hammer and you can lift it up. Well, pull it back and lift it up and remove it. Put that to the side facing up.
Punch Out:
The reason why I'm taking all this stuff out is because, this piece right here, I have to punch it out to get the reactive to fit properly and be able to feed. Okay? So, that's where this hole puncher comes in. It fits directly in there and you got to give it a good whack. I'm going to take it and put it on the floor on a carpet, and do it on the concrete instead of doing it on my tabletop because I tried it before and everything jumped, and it was aggravating. So, all you got to do is line it up, take your hammer, hold onto the marker, and give it a good whack. Make sure that wherever you're putting, wherever you're doing this, that you don't have to worry about the surface underneath. That's why I'm going to do it on the floor on a mat as well. So, that way, you don't punch a hole through anything else. Okay. So, I'll be right back, hopefully, with the hole punched. Hopefully, you were able to punch your part out as well. This is the piece that I got left over. Okay. It only took two hits, one, two, on the concrete was good. It was better than when I tried it on the desk. It was horrible. Like I said, everything jumped. So, I'm going to flip this over real quick so you guys could see the other side and see what it looks like. Alright. So, it made a very decent, clean breakthrough.
Installtion:
So, now, we're going to put everything back in, okay, especially the piston. So, let me open my parts bin. Let's go in the order that we took everything out. So, what you want to do is line up this hole with the rod right here for the camera. Line that up. Lay that back down. Slide it forward slightly. You don't have to go all the way with it. Okay. Let's get all these other items here that we got. What do we got going on here? Spring, okay. Let me do one thing at a time. Let's put the trigger back into place, which is right there. As you see right there, those two pins, put it right over. The small spring, okay, it has a little button there that the spring holds onto. So, what we're going to do is slide the spring in forward onto the button like that. Push your finger down and it'll hold on. Take the safety pin with the red part facing up and put it right into place. Then, we're going to take the trigger guard and place it back into place. Okay? And, then, we have the actual trigger itself. It also has a button for the spring, so that, you want to hold it just like this. Okay? And we actually have to get the pin that we removed -- well, that I removed because my pin comes out. I don't know if everybody's comes out. So, I'm going to put it right there. So, that pin that I took out, so this is exactly how it's going to go. Okay? You see it? Place it right down there. Now, what we're going to do is -- I know you have that green spring that went back here. We're not going to use that. We're going to use something else. There's a green spring inside the plastic bag. You're going to want to take that out and we're going to use that spring. So, the same concept with this. We're going to line it up with that little bubble and push it down with my thumb. Real quick tip, if it doesn't want to sit by itself and hold into the marker, give it a little spin with your thumb until it wants to sit and stay. Alright. This one's under some more tension, so it wants to jump around it looks like. So, we got him in there. So, now, the response trigger piston is going to want to go -- you're going to want to put this piece right into the hole just like that, and drop it down into the groove. Okay? So, you're going to want it to look like that. Real quick, I'm going to remove it so, that way, you guys can see. It has a little notch cut out for the round part.
The Hose:
Now, when I got mine in the packaging, I had a little difficulty with the hose. This piece was actually facing in the opposite direction. This unscrews, so I'm going to just tell you guys real quick as a tip, okay, so what I did to get it to turn around fairly easy was I warmed it up with a hot gun, a heat gun. Sorry. So, if you don't have a heat gun, use a blow dryer. So, that way, you could heat up the little rubber part and turn it slightly. Remember, to be safe, try to wear gloves or use a rag to turn it into the position that you want. So, that way, you could line it up. If you feel like you have to cut it shorter, which I'll be honest with you, I did. I took off about four millimeters I think or three millimeters I think it was. I had to cut it back. So, if you feel like you have to do that, the blow dryer will help you get the fitting actually off of the hose. So, that's a quick tip for your guys. Alright.
Reassembly:
So, we're all good here. We're going to put the spring back on. The pin goes into the spring. The spring goes into the hammer. You're going to have to adjust this until the hole lines up with the hammer itself, so the spring could go through, okay? And, then, we're going to put the rubber bumper on. Now, when you put the back piece on, there's a little notch here. I hope you guys could see that. And it's not on the bottom side. So, the notch is going to face the top of the marker. Alright. Put your hand down on that, so that way you could give the tension. Put that into place. And there you go. We're good to go. We're going to close it up and, then, we're going to flip around to the other side. So, that's basically it. Drop this down into place nice and easy. Alright. Grab your bolts. Put them into place, one, two, three, four, five. This bolt, if it doesn't go down, give the trigger guard a little wiggle and it'll drop into place. That 1/8 Allen wrench clockwise is going to tighten it up for you. And here we go again with the tightening of the bolts. Alright. I'm trying to make this as quick as possible. I just don't want you guys to fall into any problems and then you get stuck. So, I'm trying to cover all the bases pretty much. So, clockwise, like I said, is going to get these locked down for you. So, we're all good there. We're buttoned up.
RT Hose Installation:
Flip it over and you're going to see a couple of screws right here. These are basically the valve where we have to get into. It's where the air comes out to feed the piston. So, take a flathead screwdriver. Counterclockwise is going to remove it. You can do either/or, bottom or top. It's up to you. Alright. And this is where this is going to come into play where we put this into place. So, this is going to be the ? socket wrench. So, I'm going to use this so that it doesn't strip. You could use a flathead screwdriver if you want to. I prefer this so that, like I said, it doesn't strip anything out. I don't mess anything up. If you want, I definitely recommend that you get it started with your hand. I'm sorry I'm going back and forth. Alright. So, line it up and you should be able to twist it with your hand to make sure that it's lined up really good. You want to tighten that down. Now, on this, you don't want to crank it all the way down. You just want to get it snug so, that way, it doesn't really move. It should be good right there. Just as long as it's not wiggling back and forth, that's good. So, now, I'm going to have to switch out and get the 5/16 to tighten down the back end. You could do the same thing here where you start it with your hand. Alright. Try to hold this fairly, you know, into any position where you want the hose to line up. Now, the 5/16 to finish it up. Tighten it down the rest of the way basically. Alright. And you're good to go.
Conclusion:
So, now, you have the response trigger installed and you're basically good to go like I said. Pull it back, test fire it real quick, alright? I hope this video helped you out. Sorry that it's so long. Please check out the links below for the product, to order it, and also other links for adjustments to adjust the response trigger.Alright. My name is Stitch. Thank you for watching TippmanParts.com. Later.
Leave a comment